

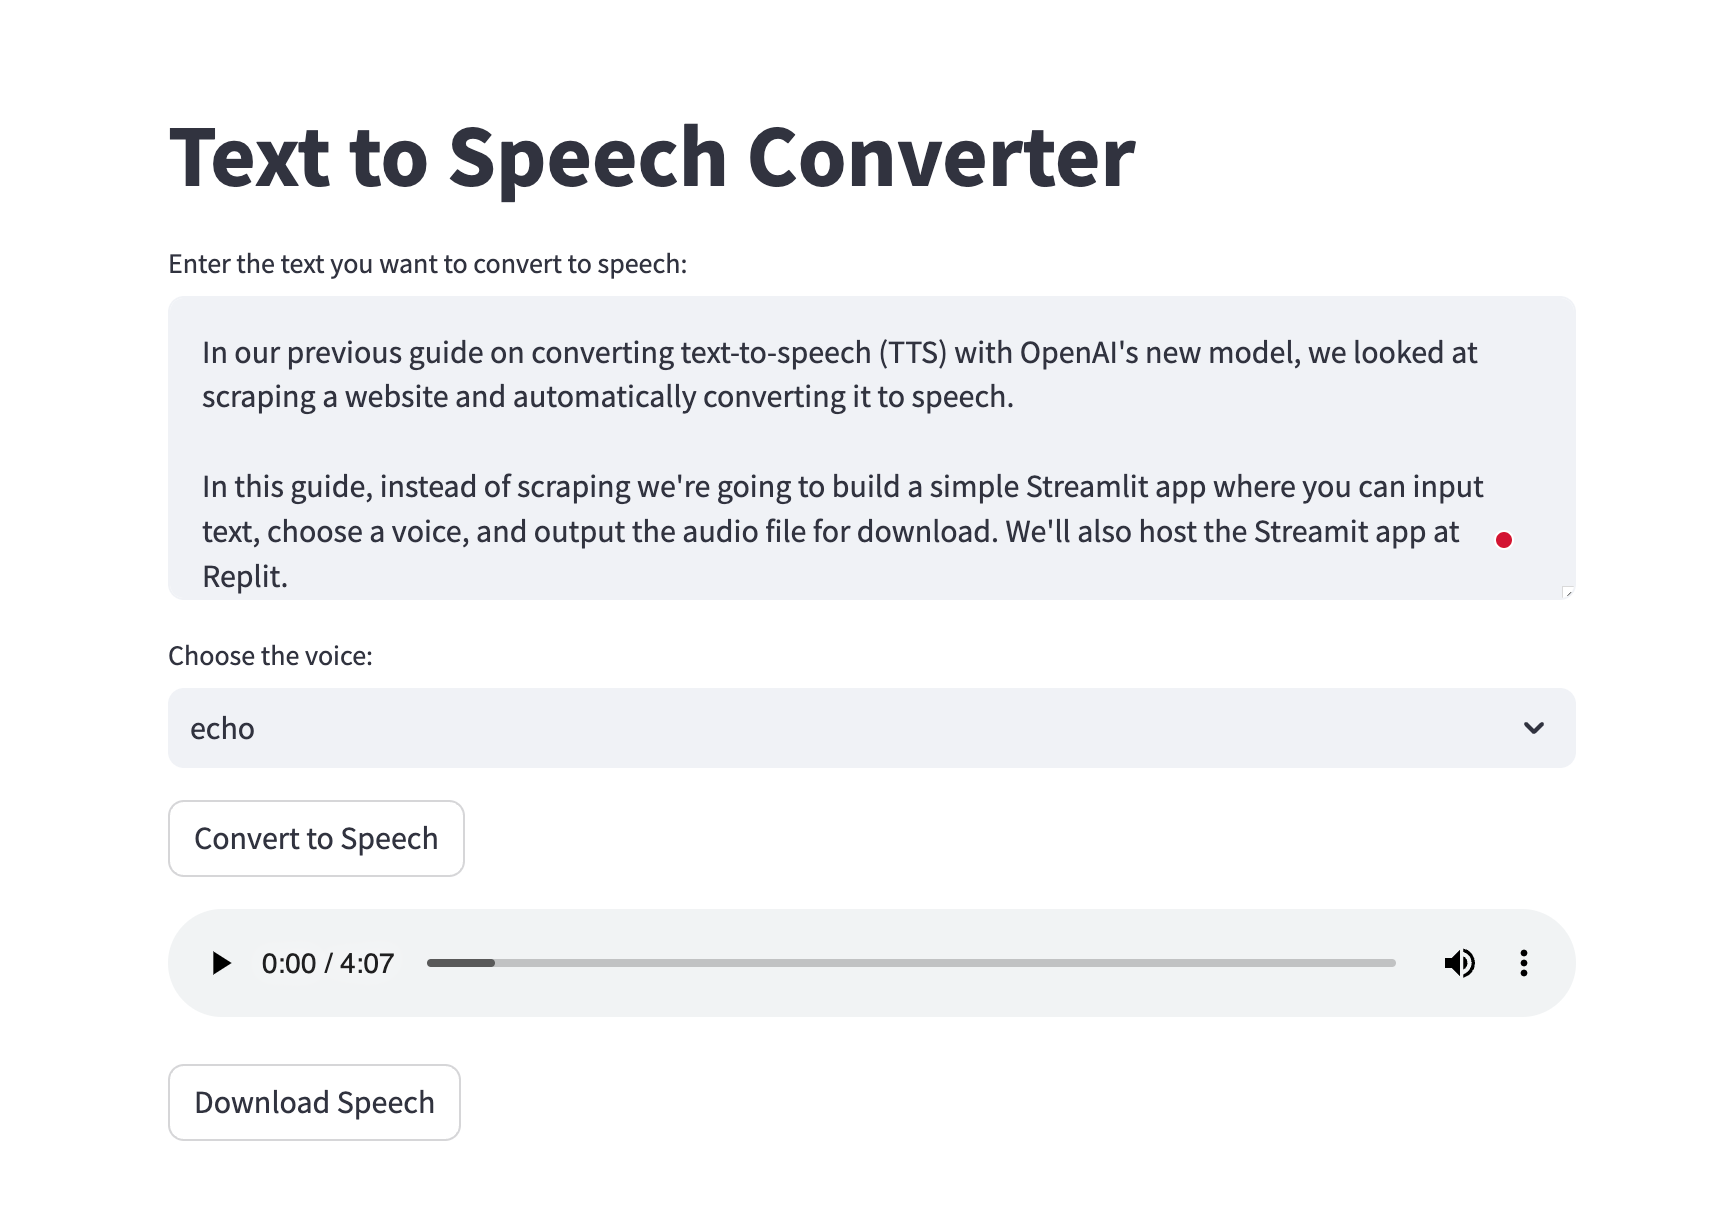
In our previous guide on converting text-to-speech (TTS) with OpenAI's new model, we looked at scraping a website and automatically converting it to speech.
In this guide, instead of scraping we're going to build a simple Streamlit app where you can input text, choose a voice, and output the audio file for download. We'll also host the Streamit app at Replit.
Let's get started.
Installs & Imports
First up, we need to install Streamlit, OpenAI, and PyDub will be used for combining audio files if our text exceeds the 4096 character limit (~800 words).
pip install openai streamlit pydub
Next, let's import these packages into our script. We'll also need to set our OpenAI API key with Replit's secret manager and retrieve it as follows:
import streamlit as st
import os
from openai import OpenAI

# Retrieve the API key from an environment variable
OPENAI_API_KEY = os.getenv('OPENAI_API_KEY')
Finally, let's initialize the OpenAI client:
# Initialize the OpenAI client
client = OpenAI(api_key=OPENAI_API_KEY)
Text to Speech with OpenAI
Next up, let's go and create our main text_to_speech function, which handles the conversion from text to audio:
- Input parameters: The function takes in
textand thevoice_typeas inputs, defaulting to thealloyvoice. You can find samples of the voices available here. - Processing chunks: As mentioned, there is a 4096 character limit, so if the text exceeds that we we want to split it into smaller chunks and process them individually.
- OpenAI API call: Each chunk is then sent to OpenAI's API with
client.audio.speech.create(), where we pass in the model, voice type, and input text. - Temporary audio files: The resulting audio from each API call is streamed into temporary files named
chunk_{i}.mp3, where{i}is the chunk index. - Collect audio files: These temporary files are then loaded into memory as
AudioSegmentobjects and appended to theaudio_fileslist. - Combining audio segments: After all chunks have been processed, we use
pydubto concatenate all audio segments into a single audio stream. - Final audio file: The combined audio is then exported and saved as
combined_speech.mp3, which is the final output of the function. - Output: The function returns the path to the combined audio file, allowing it to be played back or downloaded from the Streamlit app.
def text_to_speech(text, voice_type="alloy"):
  max_length = 4096
  chunks = [text[i:i + max_length] for i in range(0, len(text), max_length)]
  audio_files = []

  for i, chunk in enumerate(chunks):
    try:
      response = client.audio.speech.create(model="tts-1",
                                            voice=voice_type,
                                            input=chunk)
      speech_file_path = Path(f"chunk_{i}.mp3")
      response.stream_to_file(speech_file_path)
      audio_files.append(AudioSegment.from_mp3(speech_file_path))
    except Exception as e:
      st.error(f"Error in text-to-speech conversion for chunk {i}: {e}")
      return None

  # Combine audio files into one
  combined = AudioSegment.empty()
  for audio in audio_files:
    combined += audio

  # Export combined audio to a file
  combined_file_path = "combined_speech.mp3"
  combined.export(combined_file_path, format="mp3")
  return combined_file_path
Building the Streamlit Interface
Now that we've got the main TTS function, let's build a simple Streamlit interface. Here's an overview of how the main function works:
The main function constructs the user interface of our Streamlit application. Here's a step-by-step guide to how this function orchestrates the app's front-end:
- Title: We set the title with
st.title("Text to Speech Converter") - Text Input:
user_input = st.text_area(...): Creates a text field where users can input or paste the text they want to convert. - Voice Selection:
voice_type = st.selectbox(...): Provides a dropdown menu for users to select the voice type for the TTS conversion. - Convert Button:
if st.button("Convert to Speech"):This line creates a button labeled 'Convert to Speech'. When clicked, it triggers the text-to-speech conversion process. - Text-to-Speech Conversion:
speech_file_path = text_to_speech(user_input, voice_type): This calls thetext_to_speechfunction with the user's input and selected voice type, returning the path to the generated audio file. - Audio Playback and Download: If the audio file is successfully created (
if speech_file_path:), the following actions are taken:- Audio Player:
st.audio(audio_bytes, format='audio/mp3'): An audio player is embedded in the web page, allowing users to listen to the converted speech directly.
- Audio Player:
- Download Option:
st.download_button(...): Adds a download button, enabling users to download the generated speech as an MP3 file. - Running the App:
if __name__ == "__main__": main(): This standard Python practice ensures that themainfunction runs when the script is executed, launching the Streamlit app.
def main():
  st.title("Text to Speech Converter")

  # Text input
  user_input = st.text_area("Enter the text you want to convert to speech:",
                            height=150)

  # Voice selection dropdown
  voice_type = st.selectbox(
      "Choose the voice:",
      ["alloy", "echo", "fable", "onyx", "nova", "shimmer"])

  # Convert button
  if st.button("Convert to Speech"):
    speech_file_path = text_to_speech(user_input, voice_type)
    if speech_file_path:
      # Display audio player and download link
      audio_file = open(speech_file_path, 'rb')
      audio_bytes = audio_file.read()
      st.audio(audio_bytes, format='audio/mp3')
      st.download_button(label="Download Speech",
                         data=audio_bytes,
                         file_name="speech.mp3",
                         mime="audio/mp3")

if __name__ == "__main__":
  main()
Summary: Text to Speech with Streamlit & OpenAI
In this tutorial, we saw how we can quickly convert text to speech with OpenAI's new API, handle text longer than the maximum, and build a simple frontend for users.
If you want to use this app or the full code for the tutorial, you can signup for MLQ premium and access it below.
This content is only available to subscribers
Subscribe now and have access to all our stories, enjoy exclusive content and stay up to date with constant updates.
Sign up nowAlready have an account? Sign in


